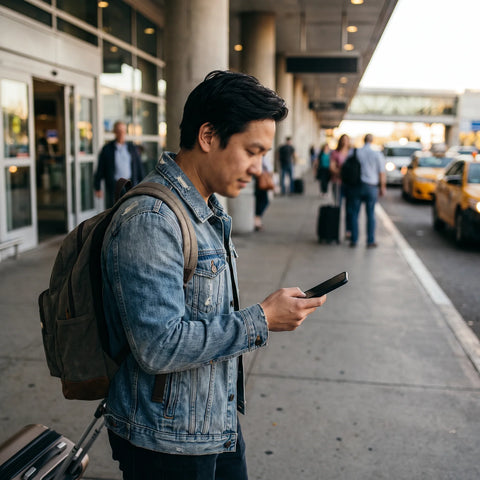
In short: an eSIM for expats gives you internet as soon as you land in your new country, without going to a store or waiting to get a bank account or local address. You install it before you fly, activate it when you land, and use it as a bridge until you get a permanent local line.
Moving to another country involves an awkward moment: you land, you don't have a local line, and you need internet for a taxi, the bank, your apartment, and to let people know you've arrived. An eSIM gives you a connection from day one as a bridge until you get your local number, with no contract, no deposit, and no need to go to a physical store. Here's how to set it up properly and what to do at each stage of your expatriation.
Why an eSIM is the best bridge when you're an expat
Direct answer: an eSIM connects you as soon as you land without paperwork, whereas getting a local line often requires a bank account in the country, registration, or a tax number, things you don't have when you've just arrived. The eSIM fills that gap of days or weeks with stable internet and Spanish-language support.
When you expatriate, there's a curious legal-administrative void: to open a bank account, you often need a local phone number, but to get that number, you're asked for a bank account. The eSIM breaks that cycle. You install the plan before leaving home, land with data, and handle all urgent matters without relying on hotel Wi-Fi or rushing to buy a SIM at the airport in a language you may not yet master. If your move is within Europe, a Europe eSIM will cover your landing period perfectly while you complete the paperwork.

Before you fly: prepare your connection
The key to a smooth expatriation is to arrive already connected. Install the eSIM at home, using your Wi-Fi, and have it ready to activate upon landing. This way, you're not dependent on anything external on your first day, which is usually the most chaotic.
Pre-flight checklist:
- Check that your mobile is compatible with eSIM (almost all mid-to-high-end phones since 2019 are).
- Install the destination country plan in advance and leave it inactive until you arrive.
- Download offline maps, a translator, and your moving documents.
- Save screenshots of reservations, apartment address, and key contacts in case your battery dies.
Installation is quick: our guide on how to install an eSIM has step-by-step instructions. The advantage of doing it at home is that you can activate data with a tap as soon as you land, without looking for QR codes or Wi-Fi in an unfamiliar airport.
The first 48 hours: essential tasks that require internet
The first two days are a marathon of tasks, and almost all of them require a connection. Having your own data saves you stress and makes you seem (and feel) less like a lost tourist.
What you'll need internet for as soon as you arrive:
- Transportation: ordering a taxi or ride-sharing service, buying a metro pass, looking up routes.
- Accommodation: communicating with the landlord or reservation app, opening smart locks.
- Banking: many neobanks (Revolut, N26, Wise) can be opened from your phone and provide an IBAN to get started.
- Paperwork: making appointments for residency registration, a tax number, or national insurance in the country.
Expat tip: open an account with a digital bank before you move. It gives you an IBAN and a card without visiting an office, and many local services will accept this while you arrange a "serious" account.
For remote work during these first few weeks, a stable eSIM is invaluable; if you're connecting to company tools or banking from networks you don't control, take a look at our guide on VPN and travel privacy with eSIM.

From eSIM to local line: when to make the switch
The eSIM is a bridge, not a permanent destination for someone staying long-term. Once you have a bank account and local address, subscribe to a local plan: it will be cheaper in the long run and you'll have a local number for banks, delivery services, and official services.
The ideal time to make the switch is usually between the second and fourth week, when you already have:
- A local bank account or neobank with a country-specific IBAN.
- A residential address (rental contract or registration).
- An ID document or residence permit in process.
In the meantime, the eSIM keeps you operational. And here's a smart move: many mobile phones allow you to carry two SIMs at once (one physical and one eSIM, or two eSIMs), so you can have the new local line and keep the eSIM (or your Spanish number) in parallel without changing phones or messing with trays. If you're still debating between getting a local physical SIM or continuing with an eSIM for this second phase, this comparison of international chip vs. eSIM will help you decide.
Keep your Spanish number active
When you expatriate, you won't want to lose your Spanish number: your Spanish bank, the tax agency (Hacienda), your family, and dozens of services use it for SMS verification. The elegant solution is dual SIM: your Spanish number for receiving those SMS and calls, and the eSIM (or later the local line) for data.
With this setup, you receive the Spanish bank code while browsing with data from the new country, all on the same mobile. You can leave your Spanish SIM only for calls and SMS (without data, to avoid roaming charges) and use the eSIM for internet. If you're concerned about retaining your digital identity, keeping your Spanish number active only for SMS and calls is the simplest option while you settle in. The key: disable data on the Spanish SIM so that expensive roaming doesn't accidentally activate; in this comparison of eSIM vs. roaming, you'll see why it's better to do it this way instead of leaving roaming activated "just in case".
Common mistakes made by newcomers
Many expats make the same mistakes in their first few weeks. Avoiding them saves you money and headaches.
- Leaving Spanish SIM roaming on: The cost skyrockets outside the EU without you realizing it until the bill arrives. Disable it before flying.
- Waiting to buy a SIM at the airport: queues, overpricing, and sometimes they require documentation you don't yet have.
- Signing up for a local line immediately: some operators tie you to a contract; start with a prepaid or eSIM until you know the market.
- Not verifying mobile compatibility: check beforehand that your phone accepts eSIM and is unlocked.
The sensible strategy is to stagger: eSIM for the first month, prepaid local line when you have an account, and a contract only when you know you're staying and what the best plan is. This way, you're never without internet and you don't commit blindly.
What almost no one tells you before moving with an eSIM
Beyond the obvious checklist, there are details you only discover when you're already deep in the moving hassle. Here are the ones that truly make a difference.
- The eSIM installs with Wi-Fi, it doesn't just activate with Wi-Fi. Many people believe they can wait until they land for the entire process. In reality, downloading the profile (the "install" step) usually requires a connection, and then the "activation" is what you can save for when you land. If you wait until you're at the destination airport without Wi-Fi or data to do both at once, you might get stuck right when you need it most. Install at home, activate upon arrival.
- Your Spanish operator might welcome you before the country itself does. As soon as the plane lands, it's common to receive a roaming SMS from your Spanish company notifying you of non-EU rates. If you can't distinguish this from your travel eSIM, you might end up thinking something is wrong when it's actually just your originating operator's automatic notification. It's advisable to understand what data roaming is before flying to avoid confusing messages or bill shock.
- You will use more data than usual in the first few days. Between Google Maps constantly open, video calls to show the apartment to family, and uploading scanned documents from your phone, data consumption skyrockets precisely when you have the least margin. These tricks to save data with an eSIM will extend your plan while you finish the paperwork.
- Some procedures can only be done properly from a computer. Many city councils, gestorías (administrative agencies), and appointment portals have forms that break or don't allow document uploads from a mobile browser. This is not an eSIM problem, but if your move is to a country where you'll depend on these portals, bring a laptop or find a public library with Wi-Fi for those specific tasks.