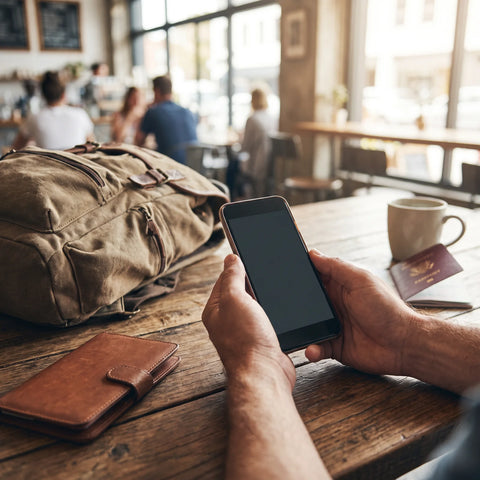
In short: an eSIM Indonesia gives you mobile internet as soon as you land in Bali, Jakarta, or the Gili Islands, without having to search for a store or change cards. You install it from home with a QR code, it connects automatically to the local network with 4G/5G data, and you avoid expensive roaming. You land with internet, no roaming, no stress.
Indonesia is huge, affordable, and addictive: Bali's beaches, Java's temples, Komodo dragons, and Raja Ampat's reefs. But the country has one detail that surprises many travelers: buying a local SIM is no longer as simple as it used to be. Here we tell you how to get connected properly, how much coverage there really is, which plan to choose, and the mistakes almost no one warns you about before you fly.
What is an eSIM and why is it so suitable for Indonesia?
An eSIM is a digital SIM card that is already integrated into your mobile phone. Instead of inserting a physical plastic card, you install a profile by scanning a QR code. This profile connects to local Indonesian operators just as a local SIM would, but without in-person formalities or paperwork. If you want the technical details, we have a guide on how to install an eSIM step-by-step that clarifies the most common doubts.
Why is it especially suitable for Indonesia? Because for some years now, the country has required mandatory SIM card registration linked to a passport (a process known as KYC). Buying a local SIM at the airport or a street stall means providing your ID, waiting for your line to be registered, and sometimes dealing with a language barrier. With an eSIM purchased online, you skip all of that: you arrive with your phone already configured, and data activates automatically.
The other major advantage is that you keep your home country's number. The eSIM occupies a separate digital slot, so your usual line remains active to receive bank SMS or the classic verification code, while data travels via the eSIM. It's the perfect dual system for a long trip through Southeast Asia.
Coverage in Indonesia and Bali: what to really expect
Coverage in Indonesia is much better than people imagine, especially in tourist areas. In Bali (Canggu, Seminyak, Ubud, Kuta, Uluwatu), the 4G signal is solid and stable, more than enough for maps, video calls, uploading photos, and remote work. In Jakarta and other major cities in Java, you'll find even better speeds and some 5G in specific areas.
The story changes when you move away from tourist centers. In inland Sumatra, rural Java, mountainous areas, or very remote islands, coverage can become irregular, drop to 3G, or disappear altogether. The country's three major networks have good deployment, but none cover 100% of an archipelago of over 17,000 islands.
| Operator | Coverage | Network | Where it shines |
|---|---|---|---|
| Telkomsel | Widest in the country | 4G / occasional 5G | Remote islands, Gili, Komodo, rural areas |
| Indosat Ooredoo | Good in cities and tourist areas | 4G | Bali, Jakarta, urban Java |
| XL Axiata | Good in populated areas | 4G | Major cities and tourist coast |
Most quality eSIMs for Indonesia rely on Telkomsel or a mix of networks with automatic connection to the one with the best signal at any given point. This is why a good eSIM usually works where a cheap local SIM might fail: it prioritizes the strongest network in the area.
4G and 5G Speed: Can you work from Bali?
Bali has become one of the world's great digital nomad hubs, and for good reason. The average speed in tourist areas is perfectly usable for everyday connected life. These figures are indicative and vary depending on the time, network saturation, and exact location, but they serve as a reference:
| Area | Approximate 4G Speed | What it's good for |
|---|---|---|
| Jakarta | High | Video calls, streaming, demanding remote work |
| Bali (Canggu / Seminyak) | High | Remote work, maps, social media, uploading content |
| Ubud | Medium-High | Browsing, normal video calls |
| Lombok / Gili | Medium | Messaging, maps, social media with patience |
| Remote Islands | Low or none | Expect total disconnection in some spots |
For most travelers, Indonesian 4G is more than sufficient. 5G exists but is limited to very specific areas of Jakarta and a few spots in Bali, so don't count on it. If you're wondering if it's worth paying more for it, the short answer is that for travel, Indonesian 4G will serve you perfectly well.
How many GB do you need for your trip to Indonesia?
Choosing the right data avoids two annoyances: running out halfway through your trip or paying too much for gigabytes you'll never use. It mainly depends on whether you'll be working, streaming, or just using maps and messaging. As a quick guide:
| Traveler Type | Duration | Recommended Data |
|---|---|---|
| Tourist (maps, photos, WhatsApp) | 5-7 days | 8-10 GB |
| Active social media backpacker | 10-14 days | 15-20 GB |
| Digital nomad / remote work | 1 month | 25-40 GB or large monthly plan |
| Intensive photo and video trip | Variable | Add extra: video uploads consume a lot |
A trick: high-definition streaming and video uploads are what devour data. If you're going to share a lot of content, use your accommodation's Wi-Fi for heavy uploads and save your eSIM for when you're out and about. With a few simple adjustments, you can stretch any plan. And if you can't decide, it's almost always better to have a plan with extra margin than to be stranded without internet on a scooter lost in a rice field.
You can see the available plans and their gigabytes on the PuraSIM Indonesia eSIM page. Prices change over time and with promotions, so always check the current rate before purchasing.
How to activate your eSIM for Indonesia step-by-step
The process is simple, and if done correctly, you'll land connected without touching a thing. The key is to prepare everything from home, with Wi-Fi, before flying.
- Check that your phone is compatible. Almost all iPhones from XS, recent Google Pixels, and mid-to-high-end Samsung Galaxy models support eSIM. If in doubt, check before buying.
- Purchase the plan online a few days before your trip. You will receive a QR code via email.
- Install the profile with Wi-Fi at home. Go to Settings and add the eSIM by scanning the QR. This only installs it; you won't use data yet.
- Configure it but do not activate it until you arrive (or just before), according to your plan's instructions, to avoid consuming validity prematurely.
- Upon landing in Indonesia, activate the eSIM data in Settings, turn on data roaming for that specific profile, and wait a couple of minutes for it to connect to the local network. Done: internet from the airport.
An important nuance that confuses many people: activating "data roaming" within the eSIM profile is normal and necessary; it doesn't mean you're paying expensive roaming. It's simply how the phone connects to the Indonesian network. If you want to understand the real difference between the two, read eSIM vs. roaming.
eSIM, local SIM, or roaming: the honest comparison
There are three ways to get internet in Indonesia, and each has its point. Here's the comparison without marketing hype:
| Option | Cost | Convenience | Drawbacks |
|---|---|---|---|
| Roaming from home operator | Very high: outside the EU can exceed several €/day or skyrocket per MB | You do nothing | The most expensive by far; bill shock |
| Local Indonesian SIM | Cheap | Low: passport registration, store, language barrier | In-person process, changing cards, lose your number |
| PuraSIM eSIM | Fair and transparent | High: 100% digital, ready before you fly | Requires eSIM-compatible phone |
Traditional roaming outside the European Union is the biggest money-eater for the unaware traveler: Indonesia is not in the "roam like at home" zone, so your normal Spanish plan can be very expensive. The local SIM is cheap but comes with the bureaucracy of KYC registration and the hassle of changing physical cards. The eSIM combines the best of both: reasonable price and zero paperwork. If you want to delve deeper, we have a dedicated analysis of eSIM vs. local SIM without embellishments.
What almost no one tells you about getting connected in Indonesia
Here are the tips that don't usually appear in generic guides and will save you more than one headache:
Local SIM registration is a real hassle
Many people land thinking of buying a cheap SIM at the airport and encounter mandatory passport registration, queues, and sometimes lines that stop working after a few days if registration wasn't completed correctly. An eSIM purchased beforehand literally saves you that first problem upon arrival.
Beware of "too cheap" stalls
In tourist areas, there are stalls selling SIMs at ridiculously low prices with data that practically vanishes or that are poorly registered. It's a lottery. It's not a widespread scam, but it is a classic source of frustration for the traveler in a hurry.
Activate the eSIM in the correct menu location
The most common mistake is not with the eSIM, but with the user: forgetting to select the eSIM as the data line, or not turning on roaming within that specific profile. Two taps in Settings and it works. If something isn't starting, it's almost always this.
Some websites are blocked
Indonesia blocks certain sites (some adult content platforms, gambling apps, and specific websites). WhatsApp, Instagram, Google Maps, and the services a normal traveler uses work without a problem. If you need to access something specific or want more privacy on public Wi-Fi, a VPN solves it; we explain it in eSIM, VPN, and travel privacy.
The ferry to the Gili Islands is no man's land
During the boat trip to the Gili Islands, the signal comes and goes depending on the distance to the coast. Download offline maps and accommodation bookings before boarding. Upon arrival in Gili Trawangan, there is basic 4G coverage.
Bali runs on scooters: prepare your maps
The way to get around Bali is by scooter, and sometimes you go down paths where the signal drops. Have Google Maps with the area downloaded offline, and your eSIM will get you out of almost any trouble.
Indonesia as part of a longer Asia trip
Few people go only to Indonesia. It's common to combine it with other Southeast Asian countries. If that's your route, plan your connectivity for each leg in advance: you can have one eSIM per country or consider regional options. For the most common neighboring destinations, we have a dedicated guide to eSIM for Thailand, with its coverage and specific tips. And if your trip to Bali is actually a life change working remotely, you'll be interested in the connectivity guide for digital nomads.
Frequently asked questions about eSIM for Indonesia and Bali
Does the eSIM work on the small islands of Indonesia?
On the main tourist islands (Lombok, the Gili Islands, Komodo, Nusa Penida), there is coverage, usually from Telkomsel, which is the network with the widest reach. On very remote and sparsely populated islands, the signal may drop to 2G or disappear. For those areas, download offline maps and reservations before you go.
Do I need a VPN in Indonesia?
For a traveler's normal use, no. WhatsApp, Instagram, Google Maps, and usual apps work without a VPN. Indonesia blocks some specific sites, and if you want to access them or browse with more privacy on public Wi-Fi, a VPN is the solution. eSIM and VPN are perfectly compatible.
How many GB do I need for Bali?
For a one-week tourist trip, 8 to 10 GB is usually enough. For two weeks as a very active social media backpacker, estimate 15-20 GB. If you're going to work remotely as a digital nomad, aim for 25-40 GB per month or a large monthly plan directly. Video consumes the most data.
Is there 5G in Bali?
5G exists in Indonesia but is limited to specific areas of Jakarta and some spots in Bali. The vast majority of tourist areas operate with 4G LTE, which is more than enough for everything a traveler needs. Don't count on widespread 5G.
Can I keep my home number while using the eSIM?
Yes. The eSIM occupies an independent digital line, so your usual home SIM remains active for receiving SMS and calls, while data travels via the eSIM. You just need to configure the eSIM as your data line and leave your main number for calls and messages.
When should I activate the eSIM, before or after flying?
Install the profile from home with Wi-Fi calmly. It's advisable to activate the plan (when validity and data start counting) upon landing in Indonesia or just before, as indicated by your plan, to avoid wasting days of validity while flying. Installing and activating are two distinct steps.
Does the eSIM work on the ferry to the Gili Islands?
During the crossing, the signal is variable and depends on how far you are from the coast; there will be sections without coverage. Upon arrival at Gili Trawangan, there is basic 4G. Our advice: have maps and accommodation information downloaded before boarding the boat.
In short: for Indonesia and Bali, an eSIM is the most convenient and sensible option. It saves you the passport registration, dubious stalls, and the shock of roaming, and lets you land with internet from minute one. Prepare it before you fly and dedicate yourself to what's important: enjoying your trip. Take a look at PuraSIM's eSIM for Indonesia and leave home already connected.